What to Do if BitLocker Fails to Encrypt the Drive
Enable BitLocker without a compatible Trusted Platform Module
![]() 6 min. read
6 min. read
![]() Updated on
Updated on
Share this article

Improve this guide
Read our disclosure page to find out how can you help Windows Report sustain the editorial team Read more
Key notes
- BitLocker sometimes fails to encrypt disk drives, displaying several error messages.
- Usually, this problem appears when the users are upgrading their OS to a newer version.
- Cleaning the disk and re-creating the partition will most likely solve the issue right away.

BitLocker is a Windows 10 built-in tool that you can activate on your OS to protect your hard drives or removable drives from offline attacks.
While this is a welcome software offered by Microsoft for privacy purposes, the tool has glitches.
For instance, users complained about unusable protected drives when migrating from an older OS version to a newer one.
Other common BitLocker-reported error messages are:
- This device can’t use a Trust Platform Module
- Illegal operation attempted on a registry key that has been marked for deletion
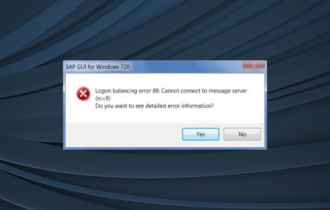
- BitLocker Drive Encryption cannot be used because critical BitLocker files are missing or corrupted; use Windows Startup Repair to restore the file to your computer (0x8031004A)
- The BitLocker encryption key could not be obtained from the Trusted Platform Module (TPM) and enhanced PIN; try using a PIN containing only numerals. C: was not encrypted
- BitLocker could not be enabled; the data drive is not set to automatically unlock on the current computer and cannot be unlocked automatically. C: was not encrypted
- The drive cannot be encrypted because it contains system boot information
You’ll find a solution for each of these errors in this article. Hopefully, by the end of this material, you’ll be able to use BitLocker to the best of your needs.
How can I fix BitLocker drive encryption issues?
1. Clean the disk and re-create the partition
1.1 Clear the partition with third-party software
Before continuing, remember that this method will erase all the information stored on your disk.
Creating a backup on a different drive is advisable to ensure you won’t lose all your files and folders.
For less hassle, you could assign this task to a third-party dedicated tool that will do the right thing. On this note, we recommend the excellent tool below.
It is a multifunctional assistant that will manage, partition, and optimize your hard drive according to your needs.
If you have a backup, run this software to split, move, resize, and manage your partitions without data loss to make the most of your disk space.
In this case, you’ll want to use the Format Partition feature to fresh-clean the disk so that you can move the saved data back into the blank space.
⇒ Get AOMEI Partition Assistant
1.2 Clear the partition manually
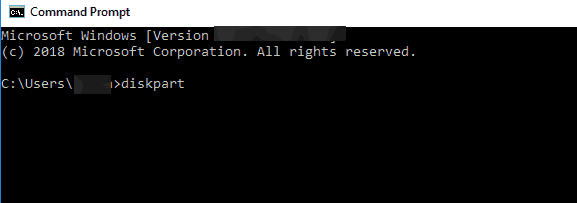
- Type cmd in the Windows search tab and click on Run as administrator to launch Command Prompt as an administrator.
- Type diskpart, and hit Enter.

- Enter list disk to show a list of all drives.

- Enter select disk # (where # is the problematic drive) and hit Enter.
- Type clean and hit Enter.
- Wait until the drive is cleaned. Now, it’s time to create a new partition.
- Type create partition primary and hit Enter
- Type assign letter = # (Once again, # is the letter you want to use).
- Format your partition by typing format fs=ntfs quick and hit Enter.

The manual process can be tricky so proceed with extreme care and follow it to the letter. If you’re not experienced, you should go with the software recommended above.
2. Change the Security Chip settings
- Start your machine and open the BIOS setup.
- Go to the Security tab and select Security Chip settings.
- Select the Discrete TPM option.
- Go to Clear Security Chip and save your changes.
- Restart your machine, log in, and enter your PIN. Check if the issue persists.
According to reports, it seems this issue affects machines equipped with Intel PTT Security Chips using particular settings.
Namely, when the issue occurred, the BitLocker Drive Encryption used TPM and PIN, and the Allow BitLocker without a compatible TPM option was turned off.
Also, the machines were running the OS in BIOS, not UEFI. We listed the general steps to follow above. Keep in mind that they may vary on your machine.
If you want to reverse the action, you need to replace the firmware’s boot capability with UEFI boot. Sometimes, you may also need to reinstall the OS.
In case you cannot arrive at a fix, we strongly recommend you switch to using the software below, which is a powerful encryption tool.
Its wide range of security features includes copying encrypted lockers to the USB drive, CDs, DVDs, and even email attachments and the possibility to upload your encrypted files to a cloud server.
3. Enable BitLocker without a compatible TPM
- Open Run from Start button, write gpedit.msc, and hit OK.
- It will open the Local Group Policy Editor.
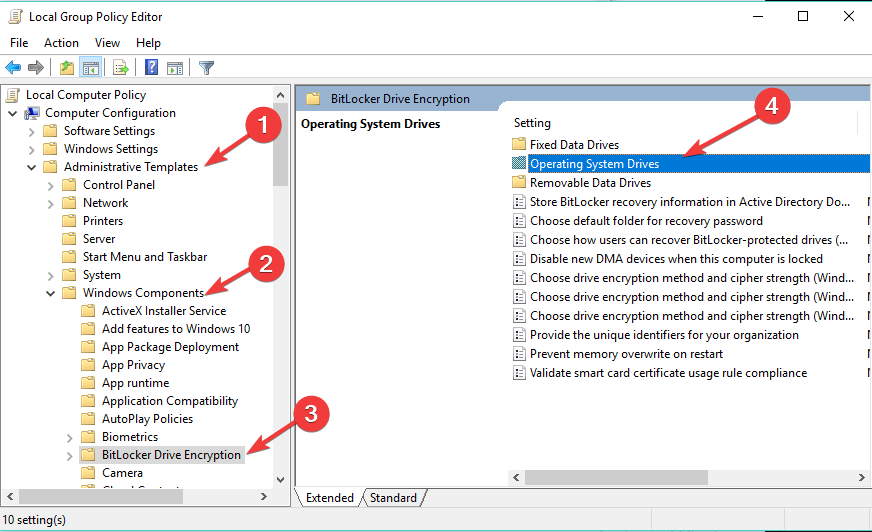
- Click on Administrative Templates from Computer Configuration and then on Windows Components.
- Select BitLocker Drive.
- Go to Encryption and then to Operating System Drives.

- Double-click on Require additional authentication at startup.

- In the new window, select Enabled and Allow BitLocker without a compatible TPM (requires a password or a startup key on a USB flash drive).
- Save the changes by hitting Apply.
- Now try to encrypt your drive by using BitLocker.

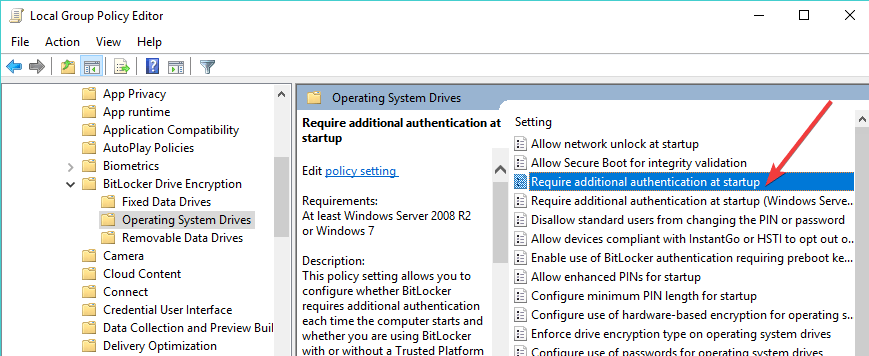
Enabling BitLocker from the Group Policy Editor without TPE can solve this problem quickly so make sure you try it by using the steps above.
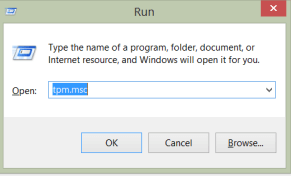
4. Clear the TPM (Trusted Platform Module)
- Open Run from Start button, write tpm.msc, and press Enter.

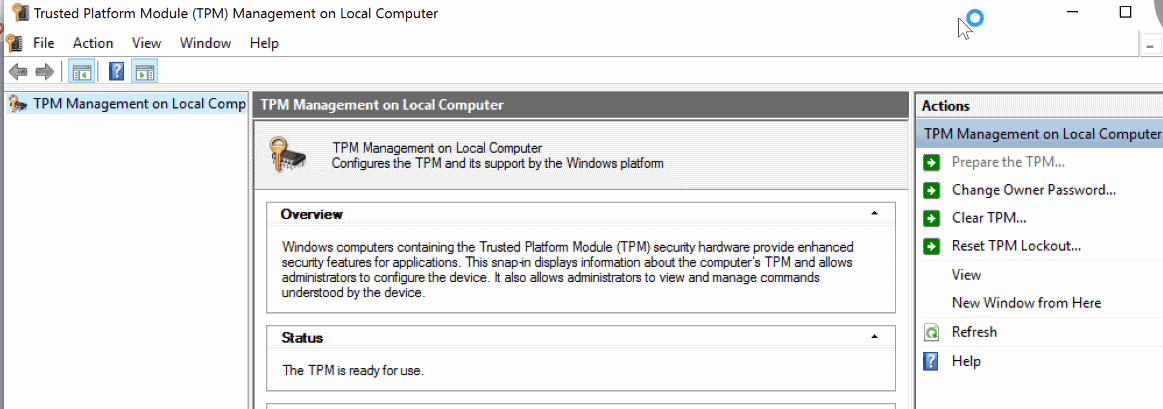
- A new management console will open.
- Under the Action tab, on the right, press Clear TPM.

- In the Clear TPM Security Hardware box, the simplest solution is to check I don’t have the owner password and click OK.
- You will be asked to reboot. It will indicate that you should press a key (usually F10) in order to clear the TPM.
- Once the system reboots, you will be prompted to press a key (usually F10) to enable TPM. Press that key.
- The TPM Setup wizard will start for you to enter a TPM owner password.

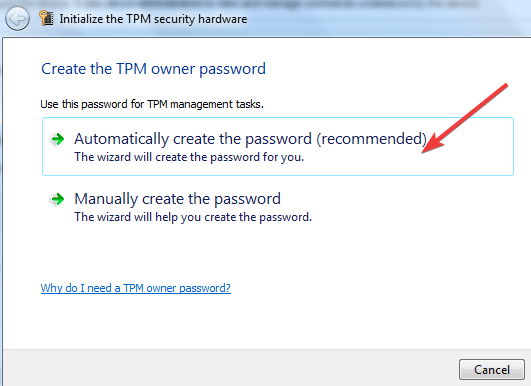
Note: Before starting to clear TPM settings, please make sure that you backed up your computer, as mentioned in the first solution. This method may result in data loss.
5. Change the settings of USB devices in BIOS
- Enter the BIOS setup utility (Consult the manual from the manufacturer to learn how to do that for your specific model).
- Go to Advanced, then Peripheral Configuration.
- Access USB Host Controller and USB Devices.
- The setting of the USB Devices should be All.


This solution applies when BitLocker fails to encrypt the operating system drive using a USB startup key. The cause of it can be related to some settings in BIOS mode.
And if all this seems too complicated, Device Encryption is available, but do check out our Device Encrytion vs BitLocker review to see which one is more suitable for you.
BitLocker usually does a great job encrypting your data, but after that, don’t forget to safeguard them with one of the best automatic backup software for Windows 10.
We hope that these solutions helped you to fix your BitLocker encryption problems. If you have additional tips and suggestions, please list them in the comments section below.