How to Disable Windows Ink Workspace on Windows 10/11 PC
![]() 3 min. read
3 min. read
![]() Updated on
Updated on
Share this article

Improve this guide
Read our disclosure page to find out how can you help Windows Report sustain the editorial team Read more
Key notes
- If you need to disable your Windows 10 Ink Workspace on your computer, this is the place to be.
- This guide is extremely useful in case your PC doesn't support a pen for digital drawing.
- To efficiently resolve this, make sure you try the Group Policy editor for the task.
- You can as well disable this functionality on your Windows 10 Home Edition device.
If you’re not a great fan of Windows Ink Workspace, you might want to disable it on your Windows 10 PC. In this guide, you will find out step-by-step solutions on how to do that.
In Windows 10 Anniversary update Microsoft introduced a new Windows Ink workspace feature to improve the pen experience. With the help of this feature tablet users whose stylus or pen can write on their device just like on paper.
If the supported pen or stylus is identified by your Windows 10 device, the Windows Ink icon will automatically appear in the system tray or in the notification area on the taskbar.
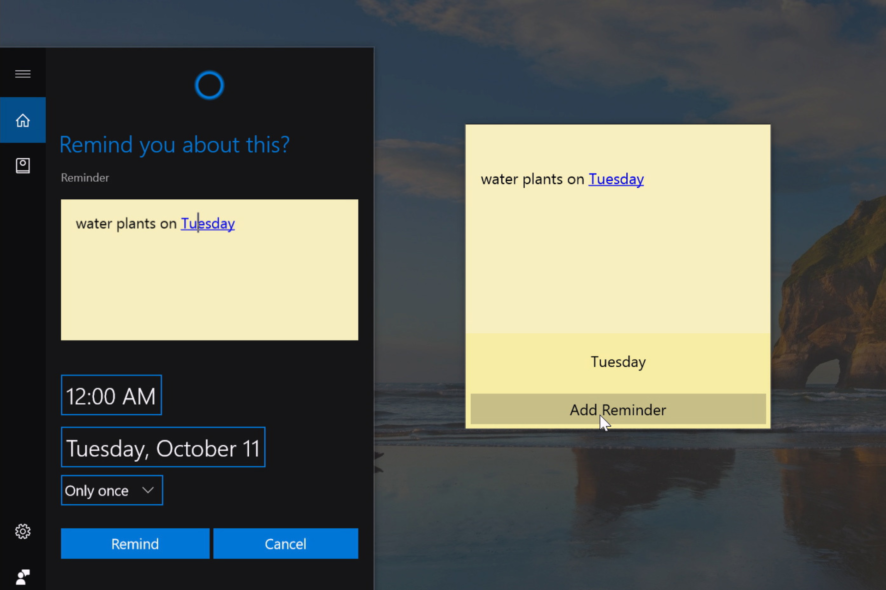
Windows Ink Workspace offers you a variety of features like you can create sticky notes, write notes on the web pages, take a screenshot of the Windows screen using screen sketch or sketchpad, create reminders using Cortana, you can draw anything on the whiteboard, edit any image and more.
Even on the Microsoft surfaces device, it is integrated with Microsoft Office, Edge, and Maps. It is really a useful feature for those whose devices are supported by a stylus or pen.
How can I disable Windows Ink Workspace on Windows 10?
In case, your device does not support a pen or stylus, then you will not find it useful and definitely want to disable Windows Ink Workspace on your Windows 10. Here is how to do it:
Disable Windows Ink Workspace using Group Policy Editor
A good method to disable Windows Ink Workspace is to use Group Policy Editor. It is a built-in administration tool which allows you to configure settings on your PC.
1. Press the Windows Key to open the Start Menu and type gpedit.msc in the search box.
2. Click on the result to launch the Group Policy Editor.

3. When the UAC pop-up appears, click Yes to continue.
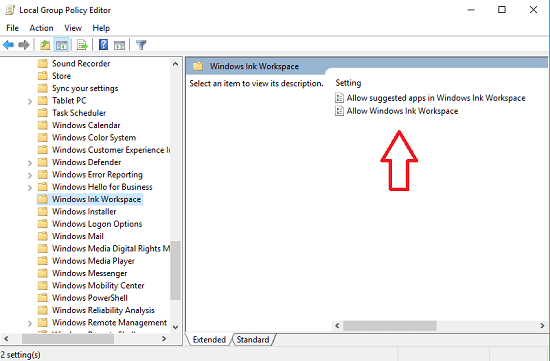
4. Navigate to the following path: Computer Configuration ->Administrative Templates ->Windows Components ->Windows Ink Workspace
5. On the right pane, look for Allow Windows Ink Workspace Settings and double-click on it.
6. Another window will open where you need to switch from “Not configured” to “Enabled” settings.
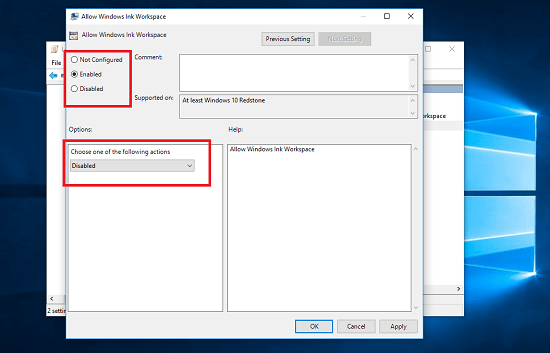
7. Under action settings, switch from ON to Disabled.
8. After that, click on Apply and then OK to save the changes.
Disable Windows Ink Workspace on Windows 10 (Home Edition)
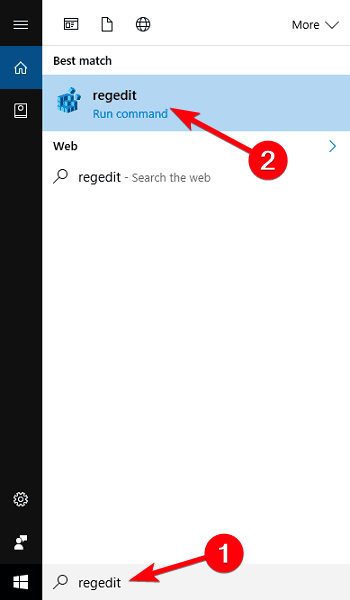
- Launch Registry Editor by typing regedit in the Windows 10 search bar. When you see Regedit run command at the top of the result, click to run it.

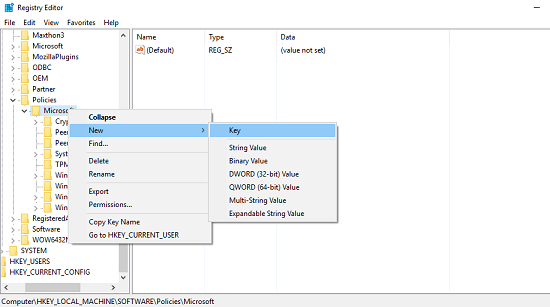
- In the Registry Editor navigate to the following Registry key:
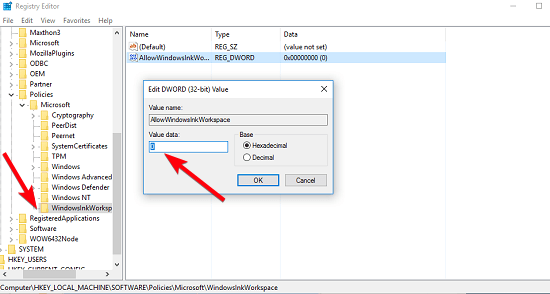
HKEY_LOCAL_MACHINE\SOFTWARE\Policies\Microsoft\WindowsInkWorkspace
Note: If there is no WindowsInkWorkspace Registry Key, Simply create one manually.
- Select WindowsInkWorksapce Key.
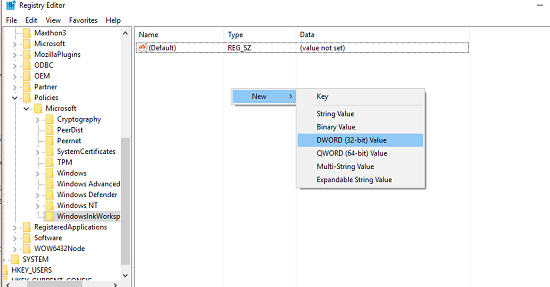
- Here on the right panel make a right-click and select New-> DWORD (32-bit Value) to create a 32-bit DWORD value and name it AllowWindowsInkWorkspace.

Make sure its Value Data is set to be 0, confirm this by making a right-click on the same value.
- Once done, you need to Sign out and Sign-in back to your Windows account to apply the changes.

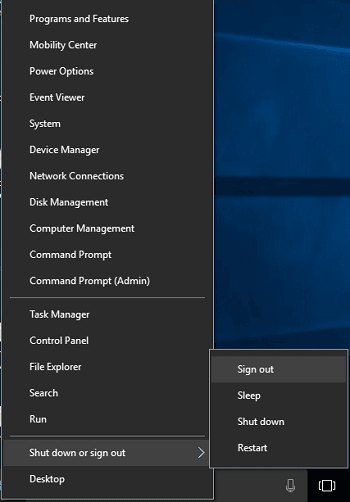
Some users reported that they noticed the changes after restarting their devices. So if Signing out and Sign-in didn’t work for you, then you can also reboot your device.
That’s it.
By applying the above registry hack, you can disable the Windows Ink Workspace feature from your Windows 10 PC.
In case, you want to enable the Windows Ink Workspace feature back, then you simply need to delete the AllowWindowsInkWorkspace parameter from the Registry Editor.
Let us know in the comments, if you’re a great fan of Windows Ink Workspace or not?